
Note from Jen: My recent post about Gifts for the Homebrewer was more popular than I expected, and I had many requests for more information about my husband’s homebrewing hobby. I’m happy to present this guest post by my husband, in which he sums up the necessary homebrewing equipment, the homebrewing process, and some of his homebrewing adventures.
Written by Mr. Roberts
My father-in-law gave a book to me last Christmas that kick-started a new hobby: homebrewing. Being British, I have a taste for good beer. That combined with my scientific background and my ability to boil water for pasta (and other culinary treats) made me feel that I had all the skills required to become a homebrewer.

I started researching what I would need and in order to get my homebrewery in operation. A name, yes, but I wouldn’t get far without any equipment. I don’t have the thousands or even hundreds of dollars that can so easily be invested in a state of the art homebrewery and, frankly, I think some of that takes away from the adventure of the hobby.
Sure, I would love a conical fermenter that can adjust the temperature within a fraction of a degree, but it just turns out that I have a basement which holds a pretty stable temperature for most of the year, suitable for most types of beer I want to make.
Homebrewing Methods
I learned of several types of brewing methods. You may have seen in-store “beer kits” which are sold in mainly 1 or 5 gallon batch sizes and use malt extract to make a wort (the proper name for unfermented beer). I liken this to making pasta sauce out of a can.
There are also kits available that use partial mashes, in which the bulk of the malt comes from a liquid malt extract, along with some grains that need to be steeped in warm water (like making tea).
The next step up is throwing that can of malt extract away altogether and purchasing all of your grain instead — this is all grain brewing.
After researching the different techniques, I settled upon one that originated in Australia called BIAB (Brew in a Bag). This is a water-saving method that uses one pot to mash grain and boil wort and produces very good results.
The first batch I made was a BIAB partial mash kit of an American brown ale called “Caribou Slobber”. I spent around $150 on the equipment I needed, including the partial mash kit. I decided on this route as I felt there were still a lot of unknowns even after researching everything. The kit was well reviewed online and included very easy-to-follow instructions.
For my next brew, about a month later, I decided to buy all of my own ingredients instead of using a kit. This is more cost-effective and put me in control of finding a recipe and quantifying the grain amounts. I turned to online communities to pick out a recipe, adapt it slightly for my setup and also to seek answers to questions I had.
Brew in a Bag Homebrewing Equipment
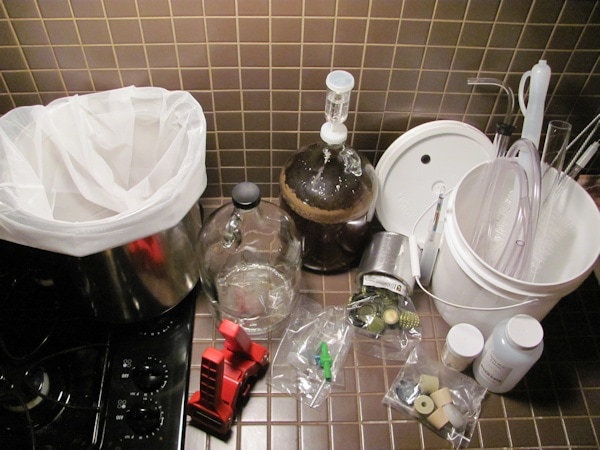
This was my shopping list for the basics I use to brew beer right in my home kitchen.
- 1 2-gallon Fermenting Bucket with Grommeted Lid
- 2 1-gallon Glass Fermenting Jugs (or Carboys)
- 1 4-gallon Kettle for boiling wort
- 1 Grain bag (fine mesh bag to steep grains in)
- 2 Three-piece Airlocks
- 1 Pre-cut 3/8″ ID Siphon Hose (6 ft. length)
- 1 3/8″ In-line Valve
- 1 Beer Bottle Brush
- 1 Gallon Jug Brush
- 2 38-mm Screw Caps with holes
- 2 38-mm Polyseal Screw Caps
- 2 No. 6 Solid Stoppers
- 2 No. 6 Drilled Stoppers
- 1 5/16″ Mini Auto Siphon
- 1 Spring Tip Bottle Filler
- 1 Hydrometer
- 1 Kitchen Thermometer
- 1 Fermometer
- Cleaning supplies – I use PBW for cleaning and Star-San for sanitizing
- 24 empty beer bottles – of course you can plan ahead and stock up on store bought bottles (just don’t use twist caps)
- Bottle caps
- Bottle capper tool
- 1 gallon beer recipe kit, or separate ingredients
- Homebrewing 101: Getting Started DVD
I spent about $150 for the above supplies at Northern Brewer (using a coupon code).
The Homebrewing Process
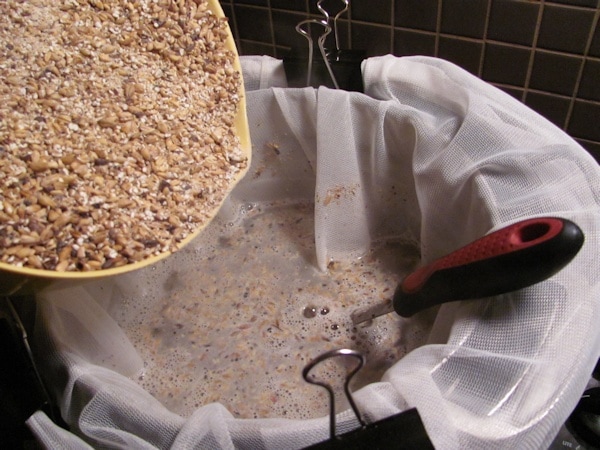
On brewing day, my morning usually starts at 6 a.m. when I place a large pot of filtered watered on the stove top to warm to the temperature at which I want the crushed grains to steep. Once the temperature is reached, I let the grains sit in the water for 60 to 90 minutes, allowing sugars to extract out from the grain.
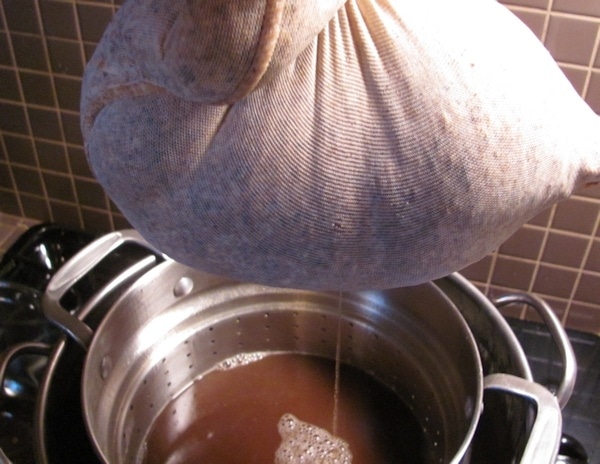
Then, after removing the spent grains the liquid which is left over is boiled, usually for 60 minutes. During the boil there may be various times where ingredients are added in such as hops (for bitterness), or other flavor enhancers like orange peel or chamomile
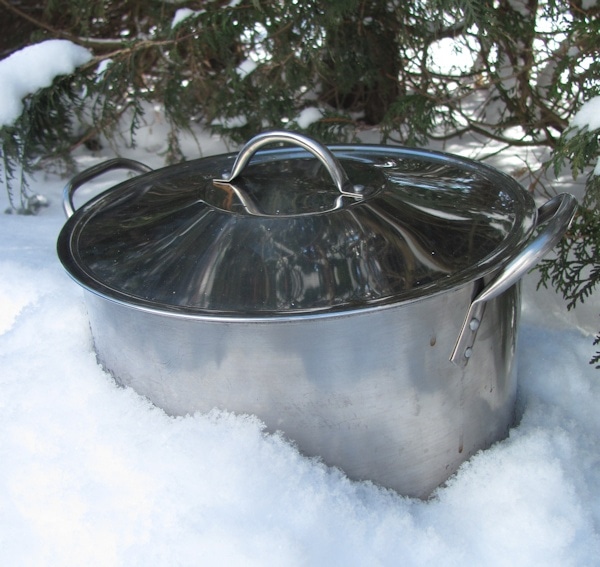
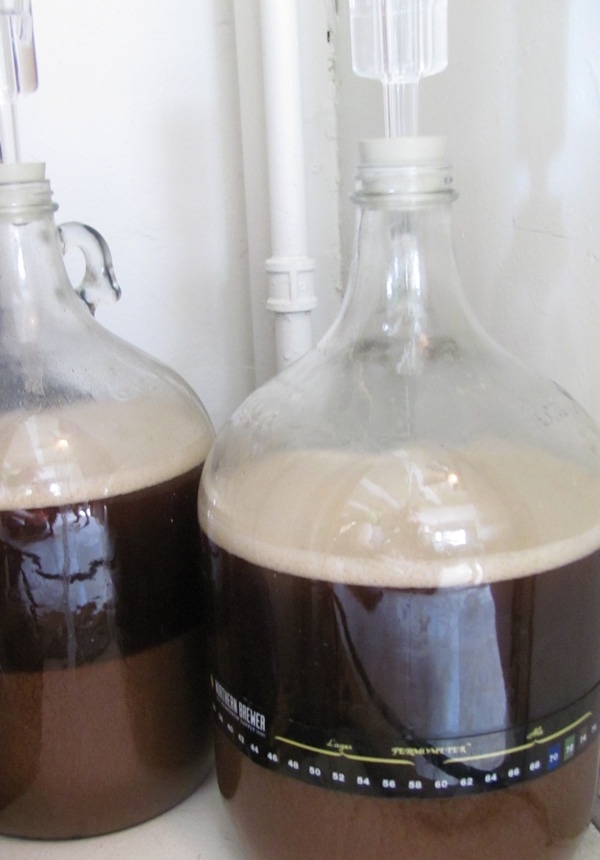
After the boil, the resulting liquid, the wort, needs to cool down to room temperature as quickly as possible to reduce the risk of contamination. I often sit the pot in an ice bath but I have been known to let it rest outside in a snow bank to cool down.
Next, I siphon off the wort into a fermenter, add yeast and leave it alone for 2-3 weeks. I will admit, I peek every now and then.
Finally, we have beer! But it is flat. The final step is to transfer this fermented beer to bottles, prime it with sugar, and let it carbonate in the bottles for about two more weeks.
I’m usually drinking a homebrewed bottled beer 4 to 6 weeks after that early morning brew day.

Adventures in Homebrewing
Homebrewing over the past year has led to interesting experiences.
Last summer I decided to enter an odd-tasting Weizenbock into the New York State Fair homebrew contest. I learned that I had pretty much killed off my yeast because I either fermented the beer at too low a temperature or pitched too much yeast. One judge likened the taste to cardboard. Better luck next time!
One time I decided to brew an English Mild, and wanting it to taste like a beer from the town I grew up in, I reached out to the local brewery in England. To my surprise, they wrote me back and even gave me a couple of recipe pointers!
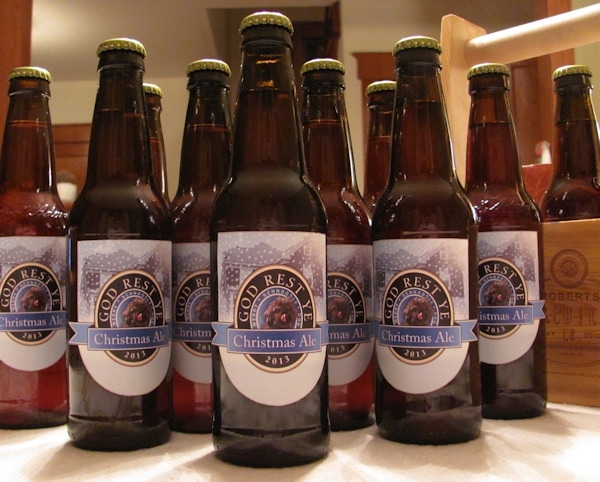
So far, I have brewed 8 different beers. I don’t have a particular favorite because I find drinking beer is very seasonal. I may long for a stout in the cold days of February, but my Christmas beer, an ale made with ginger and cinnamon, was a big hit this year.
Currently, I have an “unknown” beer fermenting thanks to a mis-measurement — at the supply store I had asked for 3 lbs. of one grain and 2 oz. of another, intending to make a KölschBier. I discovered later that I had been given (and paid for) 3 lbs. of one and 2 lbs. of the other! It seems like I have some kind of bock on my hands. But grain, mixed with warm water, hops and yeast will always make some sort of beer, so maybe this latest adventure will pan out okay.

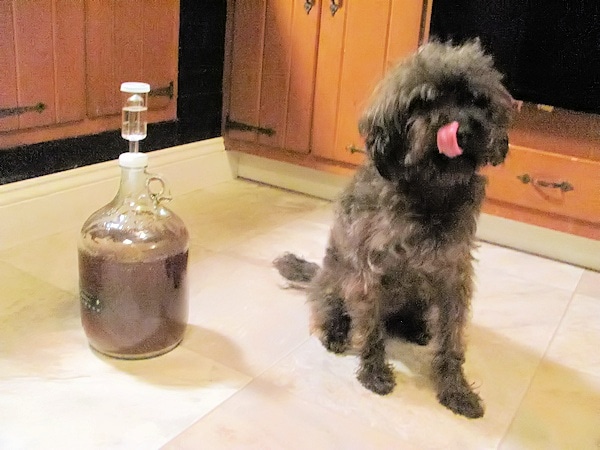
As for the name of my kitchen-based “brewery”, I turned to our family dog, and loyal kitchen companion, as my official mascot. And so we have the Schnoodle Brewhaus.
If you want to follow along with my brewing adventures, you can find me on Brewtoad where I have posted a small collection of the recipes I have used.
Nice to meet you Mr. Jen Spends! Thanks for the thorough writeup. I’m going to start brewing myself soon, so I’m going to bookmark this one.
I’m into the high octane IPAs, so I’ll probably go a little nuts with the hops. Out here in Colorado, the beer scene is pretty wild. There is a local place that has an 18 percenter. Nasty in my book, but I like that they’re adventerous.
Thanks and good luck with getting started in brewing! A couple other resources which really got me going were the forums at http://www.homebrewtalk.com and the online book at http://www.howtobrew.com
Thank you, much appreciated!