
One of the more difficult realities of being a parent living a frugal lifestyle is that time passes. Often we are forced to rethink our child rearing hopes and dreams as we realize that the years fly by.
I’ve learned how to provide my boys with good food, nice clothes, and happy celebrations. But there are some things we would like to do that simply don’t fit neatly into a modest budget, and by the time we might save up the cash, the moment will have passed.
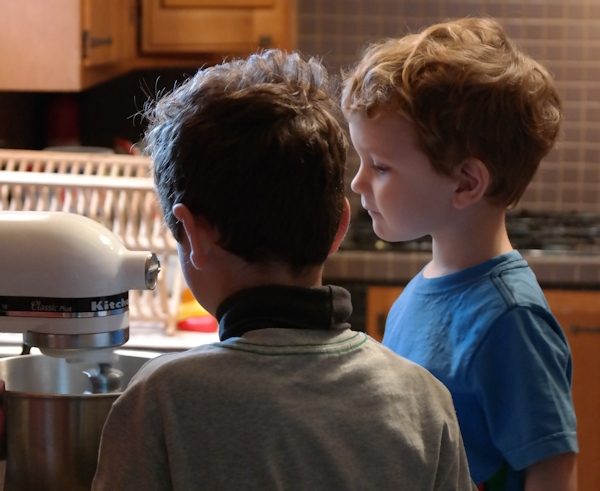
My boys are now 8 and 3. My eldest became a Mensa member at age 6, and is a Davidson Young Scholar. His little brother shows every indication of following in his brother’s intellectual footsteps. I am often amazed by my boys, but just as often I worry about whether I am doing enough to help them realize their amazing potential.
I need to remind myself frequently that providing a loving, supportive home life is the most important thing that I can do for them, that robotics kits and pricey extracurricular activities are not essential to their success. But I look for opportunities to do what I can to feed their insatiable appetites for learning.

Playing the piano has been shown to have cognitive and developmental benefits, so I was happy to see that both of my boys have an interest in the instrument. My eldest enjoys composing songs and playing by ear. He has asked for lessons. My younger son surprised me one day when he came home from church at Christmastime and sat down to play a fairly accurate rendition of the song we had sung at mass: Joy to the World.
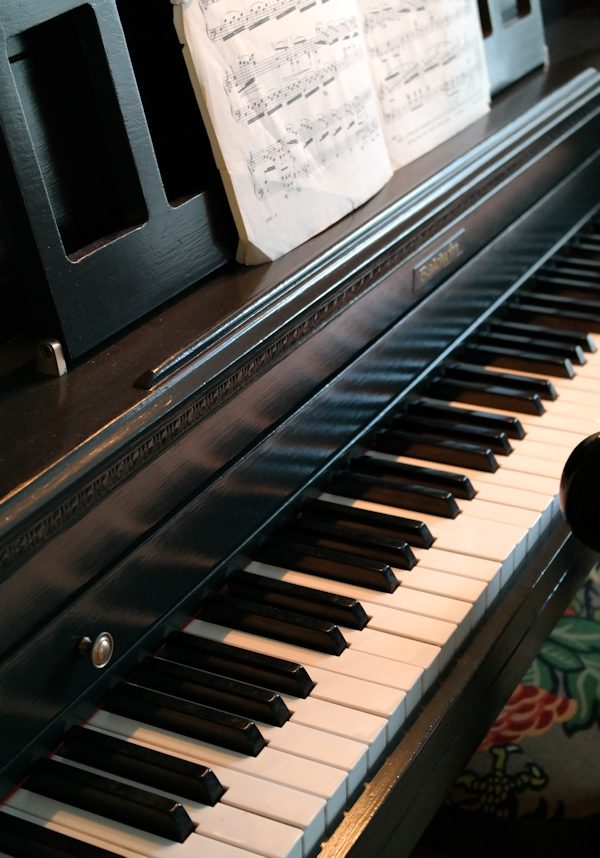
My own family of seven didn’t have much while I was growing up, but my parents somehow managed to buy a piano and I took piano lessons for 10 years. My childhood piano has been a feature in our dining room since my husband and I bought our first house and moved it in. The only problem was that years of neglect had rendered it fairly useless for serious play.
My piano hadn’t been tuned since 1991. Humidity through the years had wreaked havoc on the wooden parts. Keys stuck, and it was a chore to play. To top it all off, we had mice getting into it after moving into our old 1918 home. There was no way it would work for piano lessons.
I researched pianos and decided a new digital piano would serve us well. A digital piano wouldn’t be susceptible to the problems that had done my acoustic piano in, and I wouldn’t need to worry about having it tuned twice a year. I visited a local piano store multiple times to test and price various models.
When a special low-interest financing offer came up around Christmas, I was ready to pounce. I was determined to do for my boys what my parents had done for me. I envisioned my boys practicing on a new piano that didn’t have the many issues that my old one did.
My husband, however, wasn’t willing to pay $3,000+ over five years for a piano. I was frustrated that my hopes were dashed, but deep down, I knew he was right. As I sat down to pay off our credit card bill, as we do every month, I realized that I didn’t want to incur a new debt that would take years to pay off, even if the monthly cost would be low.
I had convinced myself that my old piano was beyond repair. The piano salesman had told me that we could dispose of it for free as part of our new purchase. Any emotional attachment I had was long gone.
But I remembered the conversation we had in the shop, when I explained just why I needed a new piano in the first place. The salesman had asked, “Has it ever been repaired? Maybe the hammers just need some adjustment.” He’s a salesman, but also an accomplished pianist and a teacher, with a soft spot for acoustic pianos. He was the first expert I had encountered who didn’t seem to think a flamethrower would be the best solution for my old piano.
Taking one more good look at my piano, I headed to the internet to find out what kinds of “adjustments” could possibly be made to make it play properly again. To my surprise, YouTube and other sites were full of information about DIY piano repairs.
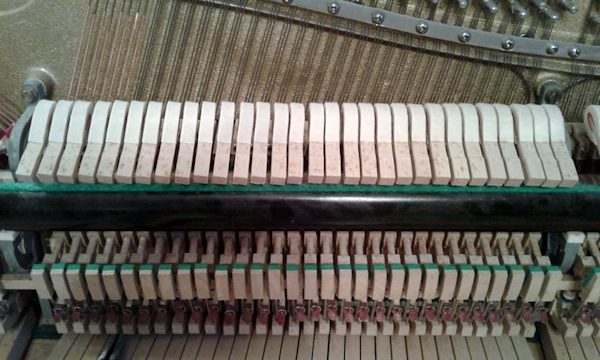
I took my piano’s case apart to get a good look at the action components, and I realized that, despite its issues, it seemed to be sturdy and salvageable after all.
I knew, though, that to pay a professional to fix it would run up some serious costs, exceeding the value of the piano, and possibly even the cost of a new piano. If it was going to be repaired, I would need to do much of the work myself.
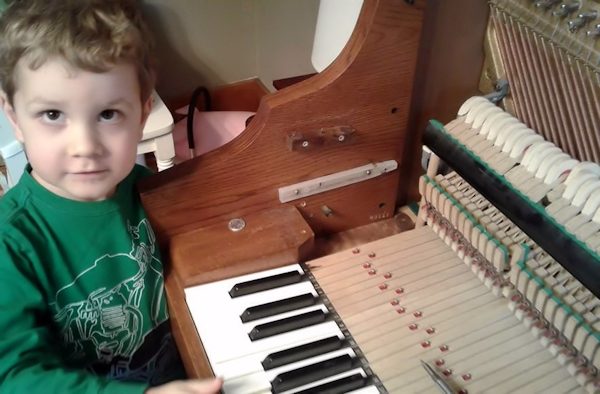
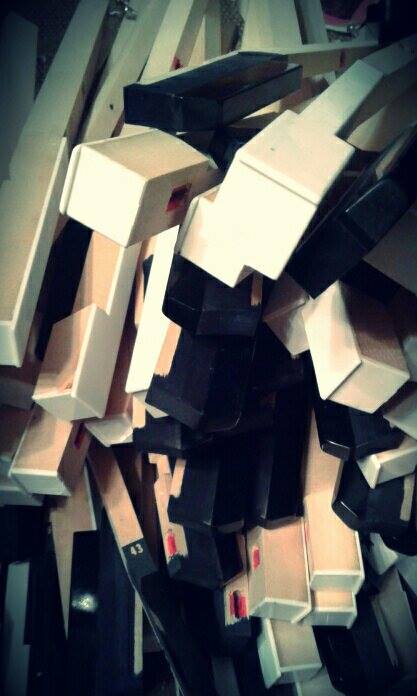
I took the piano almost completely apart, even removing the keys. It was a little bit scary, but I had been prepared to throw the piano away, and I still wasn’t sure it could be restored to working order; I had nothing to lose.
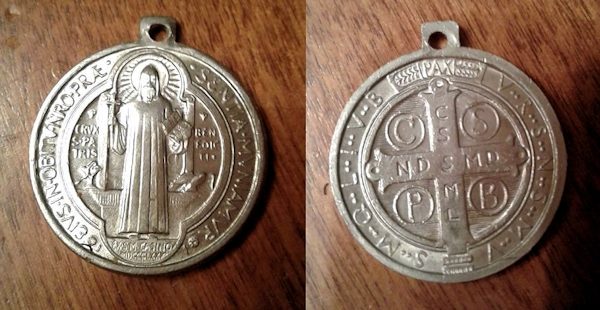
I cleaned up every bit of the mouse mess and found something interesting and unexpected. Tucked into a narrow space beneath the keys was a shiny object that I had thought was a quarter. It turned out to be a Saint Benedict medal. It had to have been placed there purposely at some time in the past. I decided to put it back where I found it when I reassembled the piano — perhaps he will ward off evil mice.
I discovered a very helpful website, Howard Piano Industries, that not only sold every replacement part I could possibly need, but the company also took the time to make instructional videos explaining different repairs in detail.
I was able to order replacement felt pads to replace the ones that the mice had chewed. I also bought a strip of red felt for along the tops of the keys, to help my old piano resemble the look of the newer pianos that I preferred.
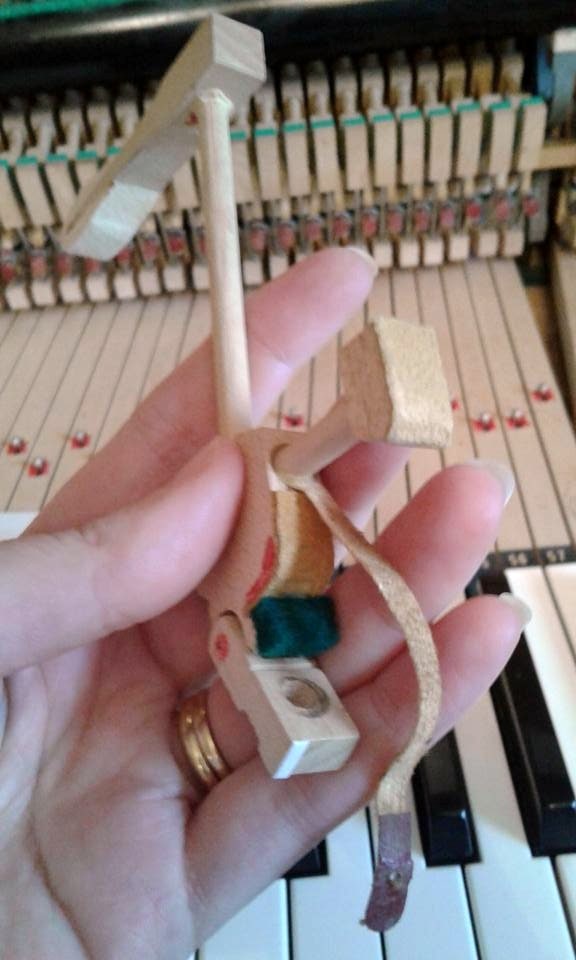
I learned that keys stuck because the hammers inside the piano were rubbing together, the result of moisture warping the wooden components. Even the hammers that could move freely weren’t all working correctly. Some had shifted position so that the hammer struck the strings incorrectly, producing a dull sound.
I learned that adding very thin strips of “travel paper” to shim the hammers was enough to shift them back into place, eliminating sticking and producing the proper sounds.
It was a delicate and tedious process, but very satisfying. While my piano will never be perfect or suitable for a virtuoso, I was able to get all of the keys working properly, and now it is much easier to play.

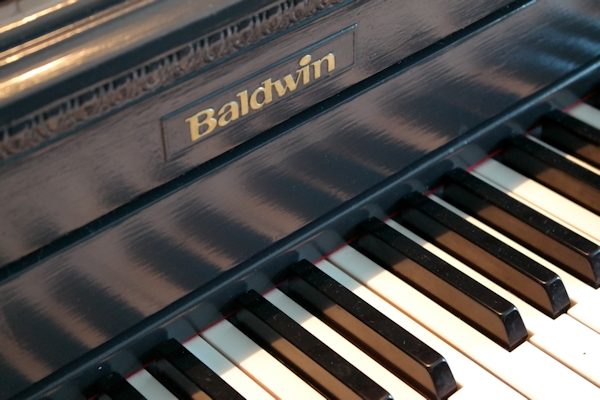
I also disliked the outward appearance of my piano, however. In the piano shop, I had gravitated toward glossy black pianos. Manufactured in the late 1980’s, mine was oak with brass hardware that looked dated, and not in a nice antique way.
The finish was also very sensitive to moisture, and there was an entire area on the top where the bare wood showed through after a houseplant had leaked. The old varnish was flaking off.
I had long thought about painting the piano, but it seemed like an overwhelming project that I wasn’t sure would turn out well. But, again, I had nothing to lose at this point. I found a helpful tutorial on Instructables and set to work.
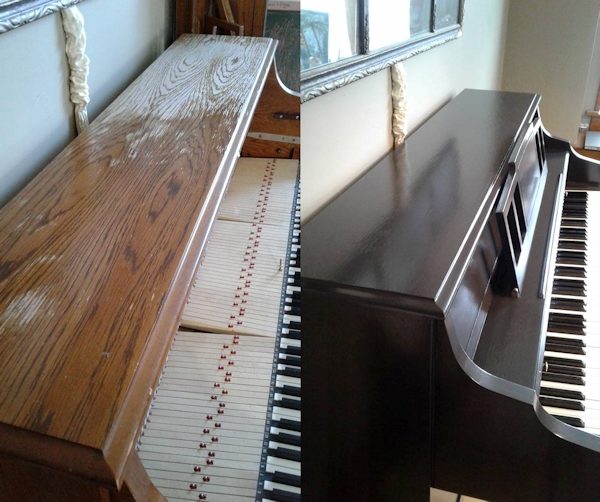
I splurged on high quality Benjamin Moore Advance paint in a satin finish. I primed the piano, then used three coats of paint and finished with two coats of Polycrylic. Like the inside, it’s not perfect, and I’m sure a real furniture refinisher would be appalled, but I am very happy with it.
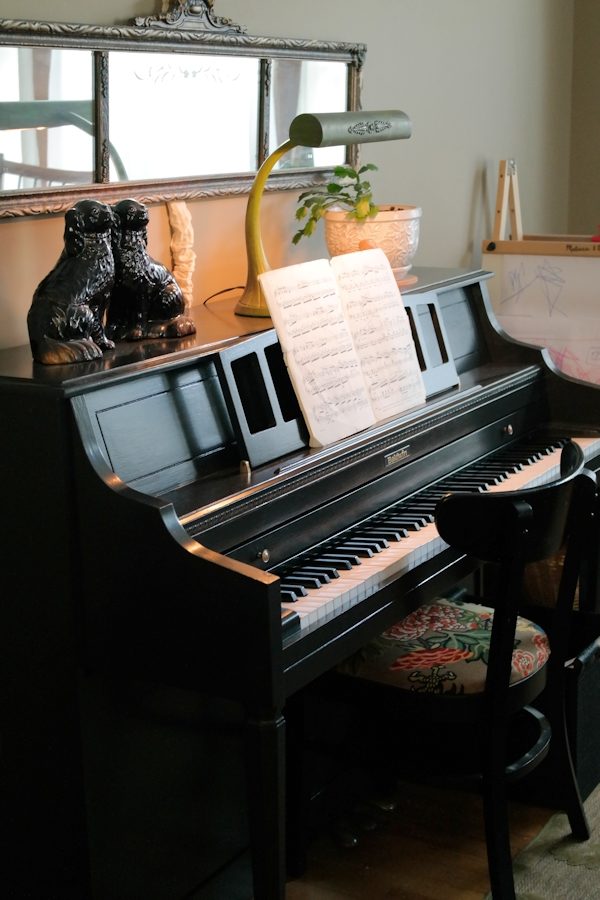
I decided to invest in a nice piano lamp, which I have never had before. I found a unique vintage lamp, in green, for about $40 on eBay.
I love how the piano looks in our dining room now — the black blends nicely with the decor, while differentiating the piano from the many stained wood surfaces in the room. It looks a bit more modern, but also classic at the same time.
With the mechanical parts all restored to working order and the painting done, it was time to think about tuning. I had considered hiring a professional tuner, but I learned that one tuning visit would likely not be enough due to the length of time since the last tuning.
I also found that many people do tune their own pianos, and it wasn’t a terribly complicated process. After taking apart and reassembling much of my piano, I was fairly confident I could manage this final step.
I ordered a basic tuning kit from Howard Piano, then watched several videos and read tutorials, like this one. There was a bit of a learning curve — it took me some time to realize that I was using the mute wedges incorrectly — but once I got over that hurdle it was smooth, if very slow, sailing.
There are numerous free apps and software available that can use your laptop or phone microphone to listen to the piano and determine where the tone falls on the scale, so you don’t need to have an expert ear.

My piano was way off. I hadn’t really noticed over the years, because all of the keys were equally way off. It took quite a bit of patience, but I was able to tune the piano correctly and it sounds much better now.
I will need to go back and do some fine tuning, but for now I’m satisfied with the sound. I’m very happy that I learned this skill because it will save money in the future, and I can do it at my leisure.
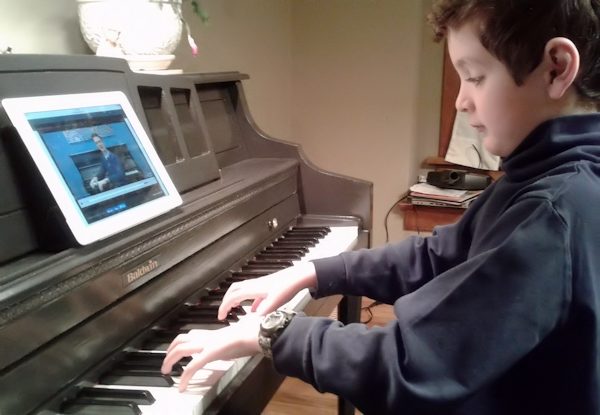
My 8 year old has started his lessons (more on our frugal piano lesson solution in the future), and everyone in the house is enjoying our new and improved piano. I no longer dream about a new piano, because I am very happy with the one that I have.
Although I had been ready to throw it away, it is special seeing my boys use the same instrument that I learned with, and its new look will remind me of the hours of work that I did out of love for them. The entire project cost less than $200.
Amazing transformation on the piano! Incredible DIY work. A big cost saving and great to have the family heirloom, still in the family. I’m sure the boys love it.
Thanks, Brian! They love it, and really enjoyed watching the whole process.
What tuning software did you use? Was it free?
I used two different tools to get the best results. On my laptop I used software from http://www.instrument-tuner.com. For fine tuning (and because I found it a little easier to read once the keys were almost tuned) I used an app called Pano Tuner on my phone. Both were free.